

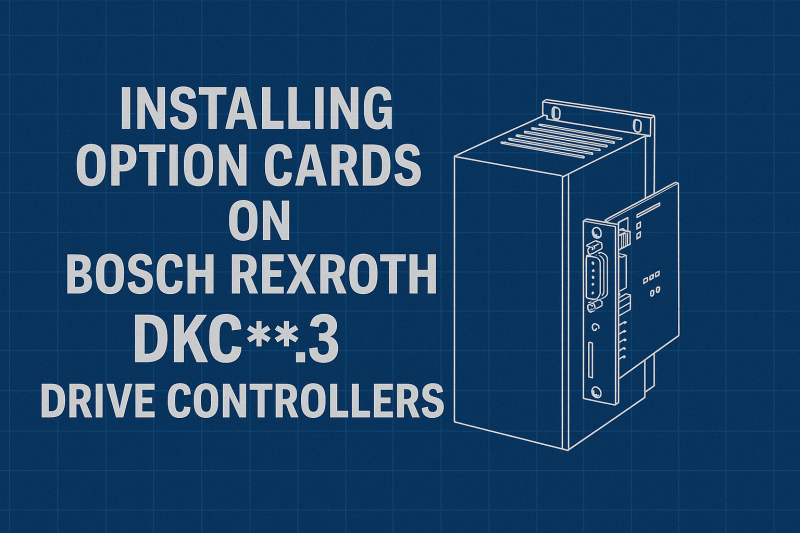
Installing Option Cards on Bosch Rexroth DKC .3 Drive Controllers
2 October, 2025 | Bosch Rexroth DKC option cards, Bosch Rexroth DKC .3 drive controllers, ECODRIVE, how to install DKC option cards, DKC03.3-040-7-FW, DKC, Bosch Rexroth Indramat, Indramat DKC card replacement,
Wake Industrial is sharing information sourced from the original manufacturer's manual. Please be advised that Wake Industrial does not offer troubleshooting assistance through phone or email. For repair, replacement, or refurbishment needs, we invite you to use our quote form or call us at 1-919-443-0207. It is the user's responsibility to exercise independent judgment and caution when implementing these instructions. Wake Industrial shall not be held liable for any direct, indirect, incidental, or consequential damages to products or individuals resulting from the use of this information.
Overview: DKC .3 Series Drives and Option Cards
Bosch Rexroth Indramat DKC servo drives (the “ECODRIVE03” series) are versatile digital drive controllers used in industrial motion control. The “.3” designation in models (e.g. DKC01.3, DKC03.3) indicates the third-generation hardware, known for improvements like plug-in firmware modules and expanded power ranges. A key feature of the DKC .3 series is their modular design: the same base drive can support different communication option cards to suit various control interfaces. These plug-in cards let you tailor the drive to your control system – whether a traditional ±10 V analog command or a modern fieldbus network – without changing the entire drive. For engineers, technicians, and plant owners, understanding these option cards and how to install them is crucial for maintaining and upgrading automation systems.
For immediate help with replacing or repairing a DKC Option Card, call Wake Industrial at 1-919-443-0207 to get a quote FAST. Wake Industrial specializes in obsolete Bosch Rexroth products including DKC Option Card. Click here to navigate to our informative YouTube video below.
Types of Option Cards for DKC .3 Drives
Indramat DKC .3 drives offer a range of option cards (also called interface or command modules) to support different communication protocols and I/O configurations. Below we break down the main types of option cards available for the .3 generation DKC drives, focusing on the ECODRIVE03 family:
DKC01.3 – Analog/Parallel Interface (Option LK–EAK02)
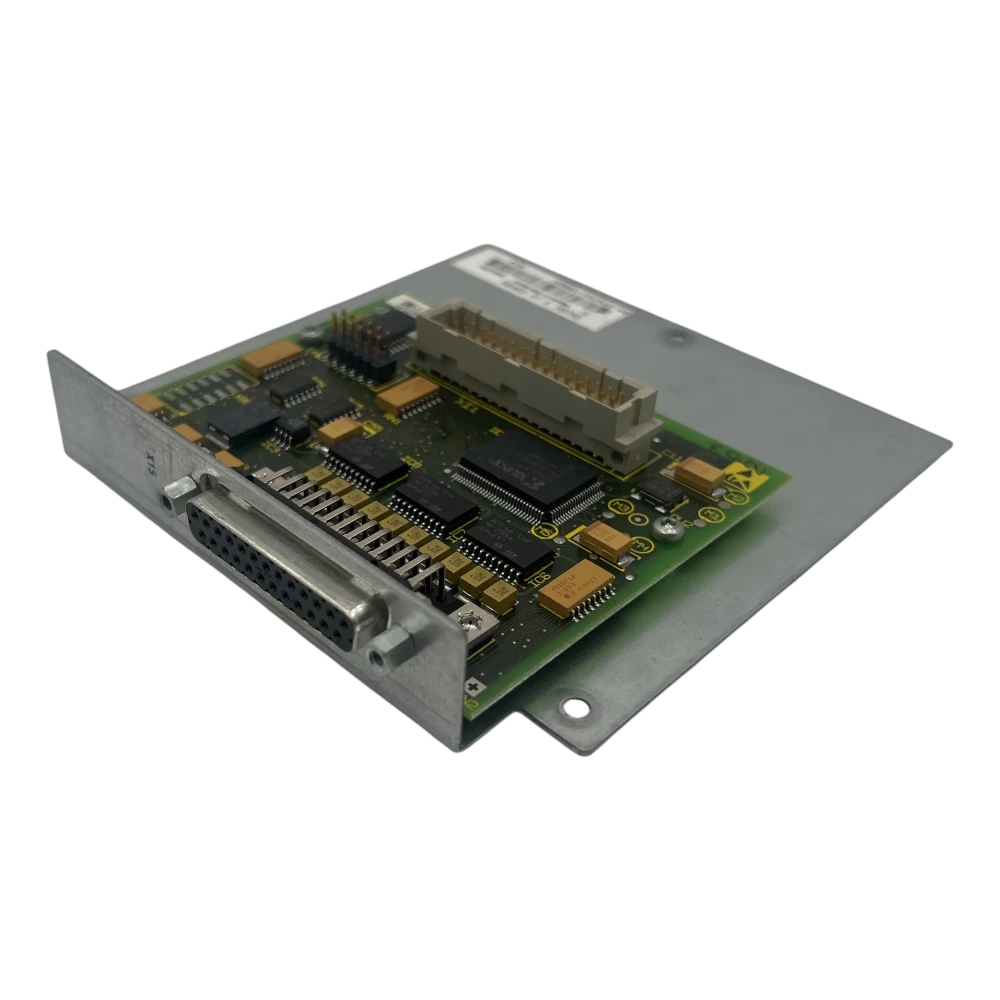 Provides ±10 V analog command input and parallel (step/direction) interface capabilities for velocity or torque control. This option is ideal for connecting to traditional analog motion controllers or stepper-style pulse outputs. It effectively equips the drive for analog reference control and basic position sequencing via I/O. For example, adding the DKC01.3-LK-EAK02 card gives the drive stepper/parallel interface functionality. All drive parameters for tuning and limits remain accessible through the DriveTop software for configuration.
DKC02.3 – SERCOS Digital Interface (Option LK–SCK02)
Implements a fiber-optic SERCOS interface for high-speed digital communication. SERCOS (Serial Real-ti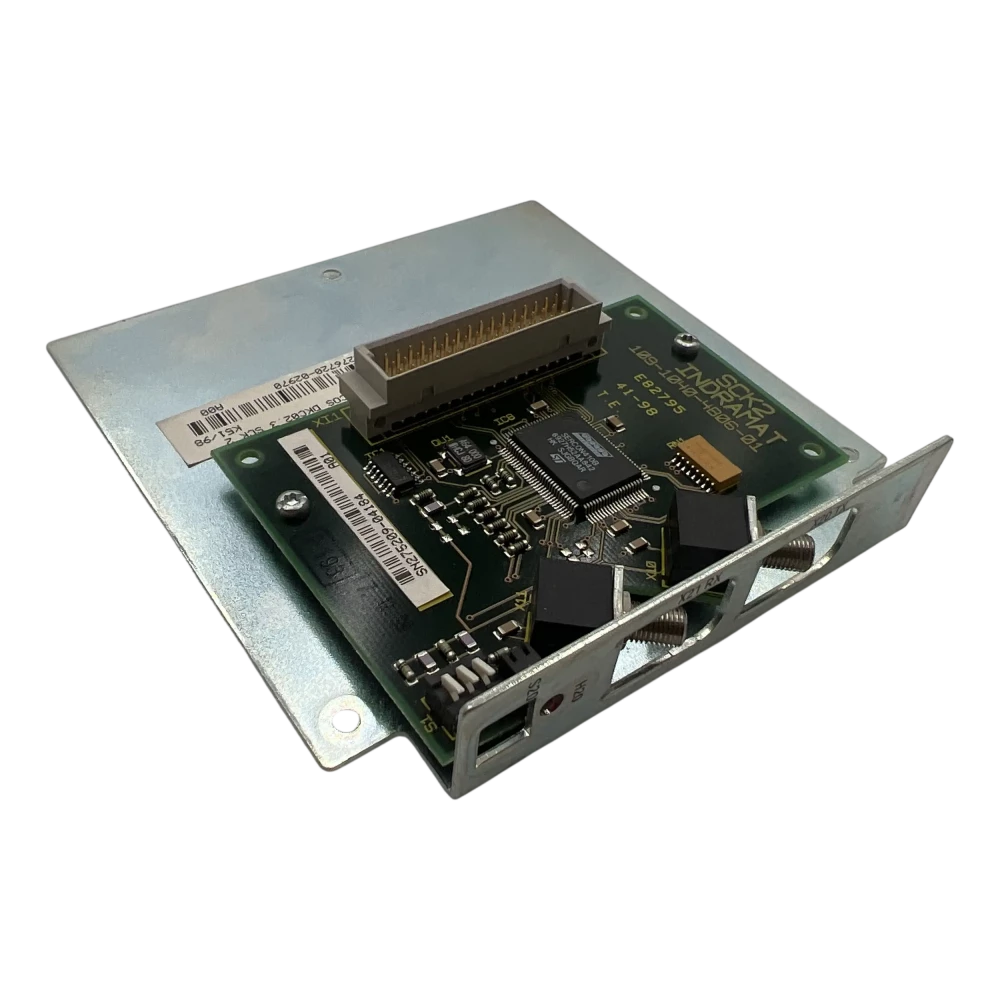 me Communication System) is commonly used in CNC and robotics for real-time motion bus networking. The DKC02.3-LK-SCK02 SERCOS option card has fiber-optic ports to connect the drive as a node in a SERCOS ring, enabling deterministic position/velocity commands from a SERCOS master controller. This card typically installs with an optical transceiver port (X8 or similar) on the drive and may require setting the drive’s SERCOS address via selector switches (often S1/S2 on the drive).
DKC03.3 – PROFIBUS-DP Interface (Option LK–PBK02)
Provides a Profibus-DP fieldbus communication port. With this card, the DKC drive can be controlled by a PLC  or CNC over Profibus, a popular industrial network. The option card includes a DB9 connector (or RJ45 style per Profibus standard) for the Profibus network and typically requires setting the node address (e.g. via DIP switches). The Profibus option enables precise, high-speed control in distributed systems. In fact, a drive labeled DKC03.3-040-7-FW explicitly means it’s a 40 A ECODRIVE03 unit equipped for Profibus-DP communication. Installing the DKC03.3-LK-PBK02 module ensures the drive “follows the Profibus-DP protocol while communicating with the motion actuators it is managing,” essentially making Profibus the command link to the drive.
DKC04.3 – Interbus Interface (Option LK–ITB01)
Enables an Interbus fieldbus connection. Interbus was widely used for networking automation devices in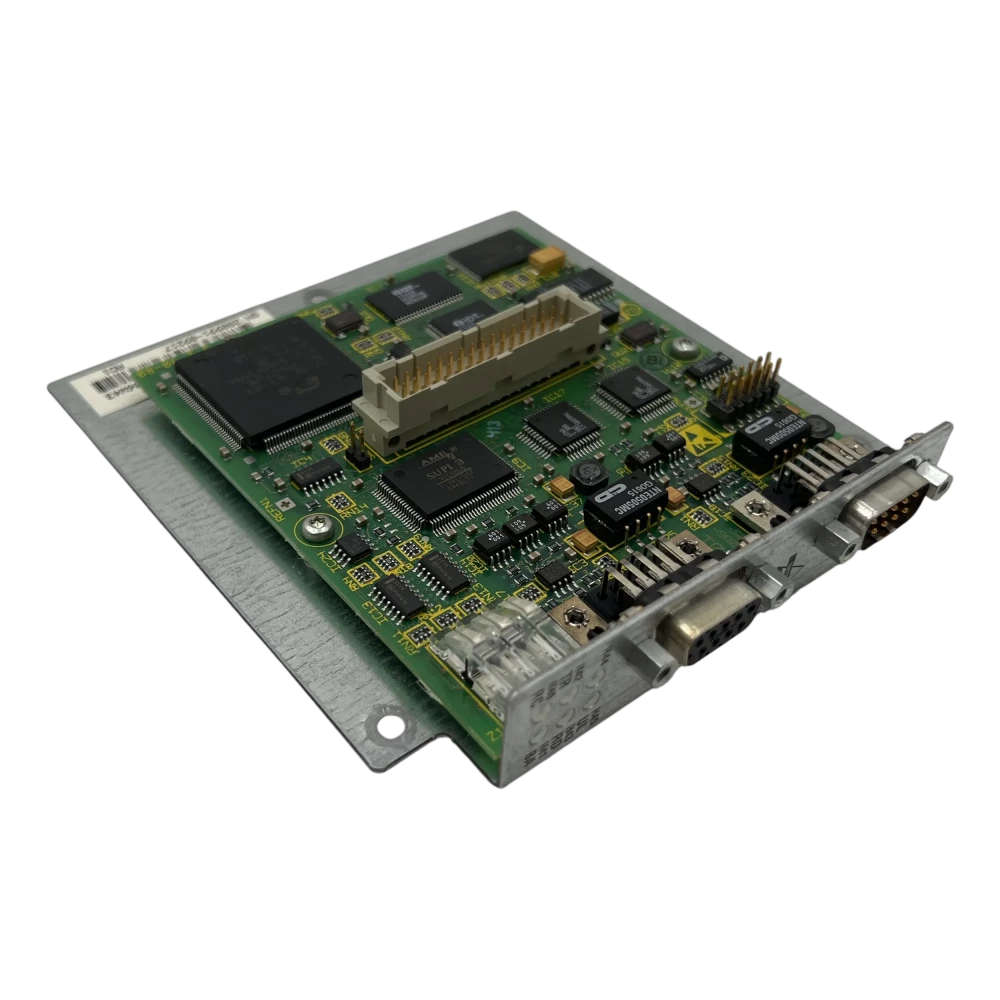 certain industries. The DKC04.3-LK-ITB01 option card provides the drive with an Interbus controller interface (commonly a D-sub or terminal plug) and integrates the drive into an Interbus loop. Functionally, this means the drive will communicate using the Interbus protocol for receiving commands and sending status. The card makes the drive adhere to the standard Interbus communication profile. Installation and usage are similar to other fieldbus cards, with network IDs typically configured by software or dip switch and cabling per Interbus requirements.
DKC05.3 – CANopen Interface (Option LK–CAN01)
Provides a CANopen networking interface. CANopen is a CAN-based communication protocol common in motion and I/O systems.  The DKC05.3-LK-CAN01 option card equips the drive with a CANopen port (usually an open style 9-pin D-sub or 5-pin phoenix connector) allowing integration with CANopen master controllers. Using this card, the DKC drive exchanges PDOs/SDOs with a PLC or motion controller over CANopen for command and feedback. This is useful in systems standardized on CANopen for drives and sensors. As with other fieldbus cards, ensure the drive’s node ID is set correctly (often via software or rotary switches) when installing the CANopen module.
DKC06.3 – DeviceNet Interface (Option LK–DVN01)
Adds a DeviceNet connectivity to the drive. DeviceNet, based on CAN, is used frequently in North American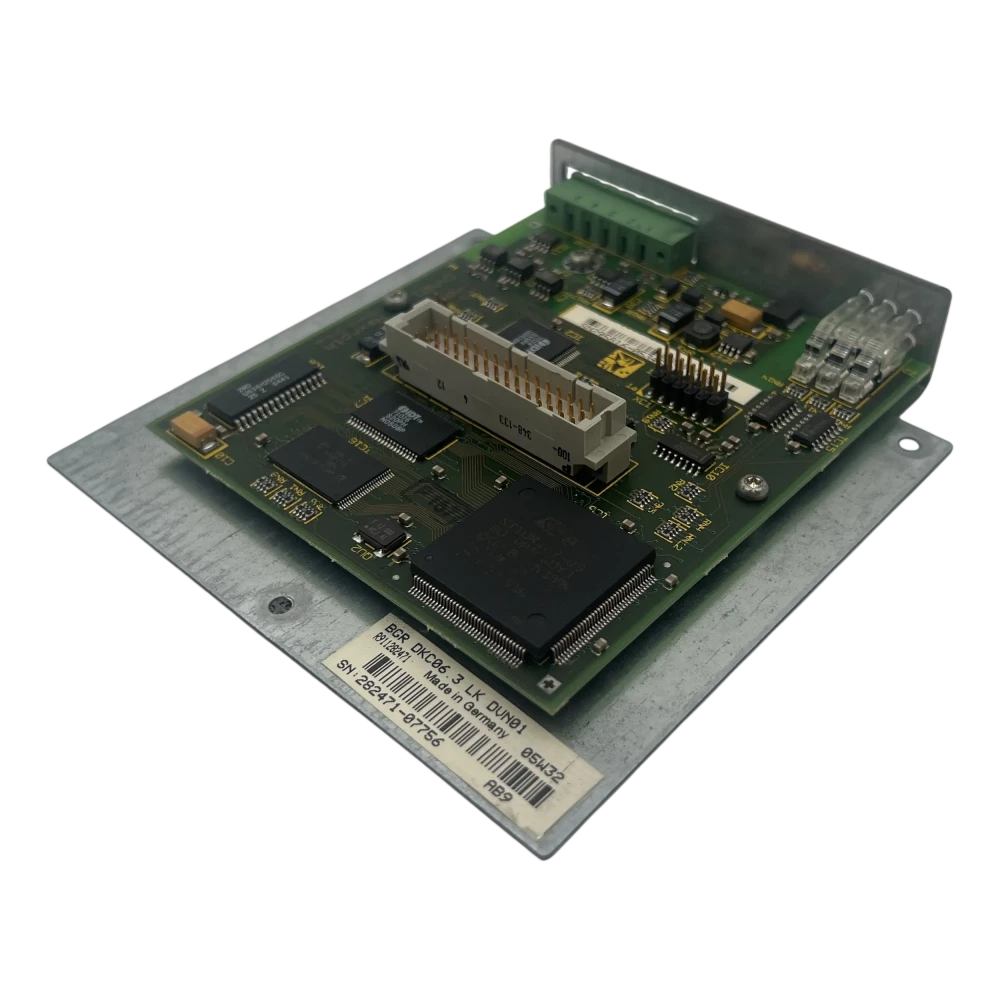 industrial setups for PLC-to-device communications. The DKC06.3-LK-DVN01 card provides a DeviceNet port on the drive and, once installed, allows the drive to appear as a node on a DeviceNet network. This includes support for standard DeviceNet profiles to start/stop the drive, set speeds/positions, and report status. Typically a DeviceNet option card will have a 5-pin pluggable connector for the network and require setting the MAC ID and baud (often via DIP switches on the card). After installation, the drive can be configured in the PLC’s DeviceNet scanner configuration.
DKC11.3 – Analog/Serial Interface (Updated Analog)
This is a later analog interface variant that incorporates an RS232/485 serial link in addition to ±10 V analog commands. Essentially, DKC11.3 drives combine the classic analog control with built-in serial communication for programming or lower-level control. (Many DKC drives include an RS-232 port by default for DriveTop software; the “11.3” series emphasized analog control with improved connectivity.) Physically, a DKC11.3 may come with the analog option module factory-installed and an updated firmware supporting both analog and serial communications.
DKC21.3 – Second-Generation Parallel I/O (Option LK–DIO01)
Provides an enhanced digital I/O and parallel command interface. This second-generation parallel interface  card (DIO01) likely offers more programmable I/O or higher-resolution inputs for positioning, addressing some limitations of the original EAK02 module. Technicians use DKC21.3 drives in applications requiring direct I/O control of motion (for example, simple point-to-point indexing via bit triggers). Installing the DKC21.3-LK-DIO01 module gives the drive additional I/O terminals for interfacing with a PLC’s discrete signals or an indexing controller. Configuration of the I/O function (positions, logic) is done in the drive parameters via software.
DKC22.3 – Analog Drive with Optional SERCOS (Option LK–SCP01)
The DKC22.3 is a variant that supports analog and serial control natively (like DKC11.3) but can be optionally fitted with a SERCOS interface module (SCP01) for added flexibility. In practice, this means you can run the drive in analog mode or plug in the SERCOS DKC22.3-LK-SCP01 card to convert it into a full SERCOS drive when needed. The SCP01 option card provides optical SERCOS ports to the DKC22.3 unit, effectively upgrading its communication to the SERCOS II standard. This modular approach is useful for plant engineers who might start with simple analog control and later migrate to a CNC or PLC with SERCOS networking – they can add the card instead of replacing the entire drive.
Wake Industrial stocks all these option cards individually as well pre-installed on the drive. Making it easy for you to find the right replacement. To get a quick quote with no hassle fill out the form on the page or email sales@wakeindustrial.com today.
How to Install an Option Card in a DKC Drive
Physically installing or replacing an option card in a DKC .3 series drive should be done carefully to avoid damage. Below is a general step-by-step guide for hardware installation:
1. Safety First – Power Down: Ensure all power to the drive is turned off and locked out. Wait for the DC bus capacitors to discharge. Working on the drive energized can be dangerous and will likely damage the option card or drive. Also, use proper electrostatic discharge (ESD) precautions – wear a grounded wrist strap and work on an ESD-safe surface when handling the cards, as they contain sensitive electronics.
2. Access the Option Card Slot: Locate the option card bay on the DKC drive. On most DKC .3 drives, the option card plugs into a dedicated connector on the drive’s control board. This is often accessed by removing a cover plate or opening the front panel of the drive. For example, some drives have a removable front plastic bezel or a metal slot cover secured by small screws. Refer to the drive’s manual for the exact location – commonly, the option card slot is near the top of the controller where the communication interfaces reside. Remove any retaining screws and the blanking plate or existing card from that slot to expose the connector.
3. Insert the Option Card: Before inserting, configure any jumpers or DIP switches on the new card as required. Align the option card’s edge connector or pin header with the mating connector on the drive’s board. The card will usually have a guiding slot or standoffs – line these up carefully. Do not force the card; it should slide in with moderate pressure when properly aligned. Press it until it fully seats in the connector backplane. You may feel it click into place or see that its faceplate is flush with the drive’s housing.
4. Secure the Card: Once inserted, fasten any screws or latches to secure the option card. Most Indramat option cards have one or two small screws on the front plate that screw into the drive chassis to hold the card firmly. Tighten these screws to ensure the card is mechanically stable – vibration in industrial environments can loosen an unsecured card. If the card has a front plate with connectors (e.g. a Profibus DB9 port or CANopen plug), ensure that the plate is aligned correctly in the slot opening and that the connectors are accessible from outside.
5. Reassemble and Connect Cables: Reattach any covers or close the drive’s front panel if applicable. Connect the required cables to the new option interface. For example, plug the Profibus-DP cable into the DB9 port (and attach the Profibus termination if this drive is an end node), or connect fiber-optic cables to the SERCOS card’s Tx/Rx ports (ensuring proper Tx-to-Rx loop connections). For analog/parallel cards, wire the command and I/O connector to the appropriate controller outputs (e.g., ±10 V command signal to the analog input pins, and digital I/O to the reference switches or step inputs as needed). Tip: Label any new cables and document the connections for future maintenance.
6. Power On and Verify: Restore power to the drive and observe the indicators. The drive’s status LEDs or display should show normal status codes. If the option card is properly installed and compatible, the drive should recognize it automatically. For instance, a DKC drive with a new fieldbus card might briefly show an error until it establishes communication with the master (e.g., a bus error if the network isn’t active, which is expected). Connect with the commissioning software (DriveTop or IndraWorks) via RS-232 or Ethernet (depending on drive) to verify the module is recognized. In DriveTop, you can typically read the interface type in the drive parameters. No recognition or a persistent fault might indicate the card is not seated fully or the firmware doesn’t support that option – double-check installation and compatibility in that case.
7. Configure Software Settings: Although the card is a hardware module, some parameterization is usually required so the drive knows how to use it. Using Bosch Rexroth’s DriveTop software (or appropriate tool), ensure the drive is set to the correct control interface mode. For example, set the “Command Source” parameter to “Fieldbus” if you installed a Profibus card (so the drive listens to bus commands rather than analog inputs). In DriveTop, all drive parameters are accessible for configuration and fine-tuning. Also configure any network-specific settings: for Profibus or CANopen, verify the node address matches what you set on switches (or set the software node ID if the card supports software configuration). For SERCOS, perform a fiber-optic phase-up (loop initialization) with the controller. If the drive stores 32 positions for I/O trigger (as supported via I/O card), you might program those positions via software at this time. Finally, save or upload the parameter file for backup.
8. Test the Motion: Put the drive into a test mode or controlled operation under the new interface. For a fieldbus card, go to the PLC/PC and try to enable the drive and issue a simple move command or jog to see if the communications are functioning. Monitor the drive’s status on the new interface (many cards have status LEDs – e.g., CANopen may have RUN/ERROR LEDs, Profibus card might have LEDs for communication status). A successful test would be the drive enabling and responding to the new command source (moving the motor or changing state on command). If there are issues, recheck wiring (especially bus termination or fiber polarity), address settings, and parameter configurations.
By following these steps, technicians can safely install or replace option cards in the DKC .3 drives, allowing a single drive model to adapt to different control systems as needed. Always refer to the official Rexroth manual for model-specific details (connector pinouts, torque for screws, etc.) and heed any warnings about handling the electronics.

Sourcing and Support for DKC Drives and Option Cards
Bosch Rexroth no longer manufactures the legacy Indramat DKC ECODRIVE03 series, so obtaining spare drives or option cards involves third-party suppliers. Wake Industrial stocks Indramat DKC drives and option cards and also offers repair services for these units. (It's important to note that Wake Industrial is not an authorized Bosch Rexroth distributor.) They carry a wide range of DKC drives, motors, and accessories, and provide quick turnaround on repairs to minimize downtime. Call 1-919-443-0207 or email sales@wakeindustrial.com to learn how Wake Industrial can help you.
In summary, Bosch Rexroth DKC .3 drives are highly flexible thanks to their modular option cards. By choosing the right option card – be it analog, SERCOS, Profibus, or others – and installing it correctly, you can integrate these rugged servo drives into virtually any control architecture. With careful installation and configuration, plus reliable suppliers for parts and repairs, your DKC drives can continue to deliver efficient, precise motion control in your plant for years to come.
Check out the video below to learn more about these cards!
Request a Quote
Cary, NC 27513